
Hello Folks, we are back with something very interesting topic. Today we are going to learn how we can record and upload the video to the server from the browser using Js & Laravel-8. So lest’s start.
If you are new and don’t know how to setup laravel then don’t worry you can start from scratch by clicking this link Laravel Setup & Simple CRUD App.
In this demo, we are going to use JS and Laravel-8 and also we will user Ajax to upload a recorded video. Let’s get started step by step.
Note: we are not going to show how to set up laravel here so you can check out our post Laravel Setup & Simple CRUD App
After installing laravel just follow these steps.
Step 1: Migration & Routing
We will create Model, Controller in a single command
artisan make:model Media -mcr A migration file will be created in the database/migrations directory, and we need to create our schema. I added file_name (text) column. I used $table->timestamps(); it will set created_at and updated_at automatically.
Then run the migration command. And also don’t forget to add file_name in App\Models\Media.php fillable.
php artisan migrateSo we have to set a resource route in routes/web.php
use App\Http\Controllers\MediaController;At top of routes/web.php and add following line after that.
Route::resource('videos', MediaController::class); We already learned how to set views and layout in the previous post if you haven’t then just check checkout by clicking this link Laravel Setup & Simple CRUD App.
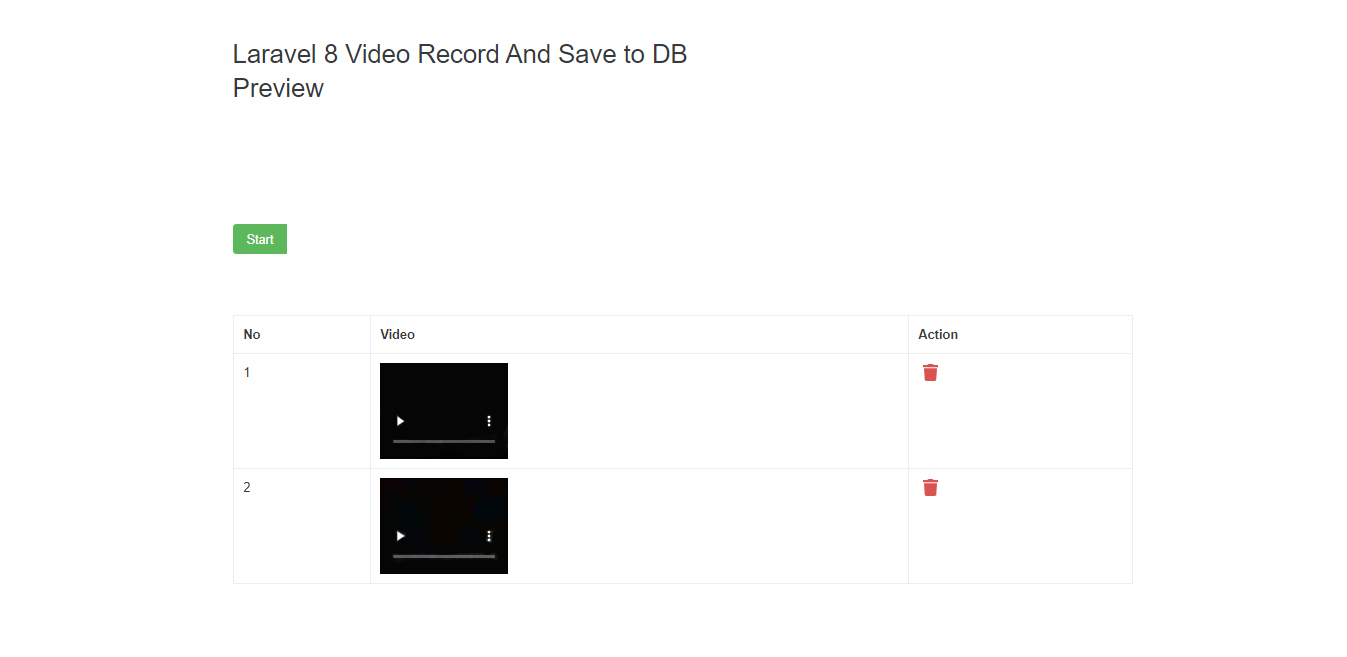
Now move to the listing page index.blade.php in this you can see a listing of all videos and also have a delete option.
Step 2: The HTML
Now we had added 2 video tags one for show recording and another one will show your recorded clip preview.
There is a start button from where you can start recording. Stop button to stop recording, Save button to save the video to the table, and upload the video file to the server.Download the button for recorded video download.
Ideally, these elements aren’t created until it’s confirmed that The client supports video/camera, but for the sake of illustrating the elements involved, they are created with markup (not JavaScript).
Here the preview will be hidden until video recording stoped.
Step 3: The JavaScript & Access the camera interactively
Modern browsers can have a direct line to the camera allowing us to build experiences that are fully integrated with the web page and the user will never leave the browser.
Acquire access to the camera : navigator.mediaDevices.getUserMedia, a simple method sets thevideo element’s src to the user’s live camera/webcam. Calling the start method of the video then starts the element’s live streaming video connection. That’s all that’s required to connect your camera to the browser! Here we are going to record the only video so the audio parameter will be false.
navigator.mediaDevices.getUserMedia({
	video: true,
	audio: false
})
Here we had set a time limit for 5 seconds so video recording automatically will be stopped after 5 seconds. You can change as per your requirement, you have to do is just pass duration in milliseconds like 5000 for 5 seconds.
So we have set console.log to track all the activity of the recording task.
Step 4: Show the streaming blob
A blob is a data type that can store binary data. This is different than most other data types used in databases, such as integers, floating-point numbers, characters, and strings, which store letters and numbers.
Since blobs can store binary data, they can be used to store images or other multimedia files. For example, a photo album could be stored in a database using a blob data type for the images, and a string data type for the captions. Because blobs are used to store objects such as images, audio files, and video clips, they often require significantly more space than other data types.
after the recording stopped we need to set a preview so the user can watch the recorded video he can download or upload to the server.
finally how our recording script looks like.
Step 5: To upload the blob(video) to the server(Laravel-8)
As shown above we had set form object to append all the data and then we passed data to the controller. Note that since we passing media objects we need to use the POST method so it’s required CSRF TOKEN for submit data. So we can set CSRF TOKEN to the meta tag so we can use it anywhere on laravel website.
<meta name="csrf-token" content="{{csrf_token()}}">document.querySelector('meta[name="csrf-token"]').getAttribute('content')Now we have to upload the video file to the server. So we need a directory where all the uploaded videos will be moved. We are using storage to move the file so we need to link storage.
Run the following command to link storage
php artisan storage:linkYou will see the storage directory like a shortcut icon in your public folder. Now just need to add the directory name and, it will create if that directory not exists and move the uploaded file to the server.
So finally how our App\Http\Controllers\MediaController.php looks like:
Of course, you could add some Audio, Image, and GIF from Browser but I’ll save that for another post. For now, however, simply accessing the camera in our browser moves us miles ahead. Have fun recording videos within your browser!
i tried your code and its not uploading in server.
Can you share is there any kind of error or something you faced?
Thanks for your blog, nice to read. Do not stop.
Thank you a lot of